Building a Document Routing Hierarchy with SharePoint Subsites and Content Organizer
June 03, 2013
In this occasion I have been exploring the possibility of an auto-organizing document hierarchy in SharePoint 2010, made with Content Organizer functionality. As you may recall, the Content Organizer allows the documents to be routed according to rules that use metadata to decide where the document should go. This greatly enhances the usability of a document repository in SharePoint, as the end users don’t have to know where exactly should the document be uploaded. By leveraging the content organizer rules, we automate the exact logistic organization of the documents and significantly lower the possibility of incorrect classification.
Content Organizer out-of-the-box
The straightforward Content Organizer works great when you cope with different document libraries on a single site. You get one “Drop Off Library” where you should upload the documents to. Once uploaded there, the documents will be routed to the right document library and optionally inside a specific folder.
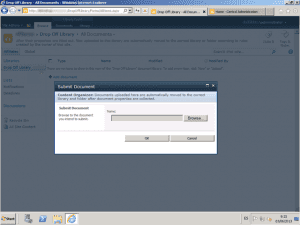
The user interface for dropping a document in Content Organizer notifies you that the document will be routed:
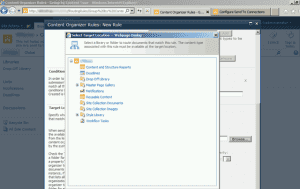
As you can see in the Content Organizer Rule editor, we only get local site lists and libraries as the destination option:
What happens when you have a hierarchy that spans multiple subsites that all share the same base content type but are strictly separated in different subsites for security reasons? Well, in this case you have to tweak the Content Organizer a bit to accommodate the subsites.
Routing Documents to a different site
In order to allow a content organizer to route a document to a different site, you have to create a “Send To” connection in the Central Administration. Go to “General Application Settings”, then choose “Configure send to connections” in “External Service Connection” section. In this page you will have to add the absolute path of the content organizer service of the site that you wish to route the document to. The URL is always the same:
- Site URL followed by /_vti_bin/officialfile.asmx
In this example, there is a subsite called “Global” and the “send to” connection" called Global is created. Please remember that the Send To Connections configuration is stored for each web application, so make sure that you are changing it for the right web application.
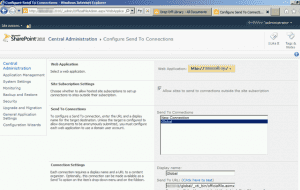
Once you have the Send To connection registered in Central Administration, you have to change two things in the site that you wish to be the entry point to the system. Go to “Site Settings”, “Content Organizer Settings” and make sure that the checkbox “Sending to Another Site” is set.
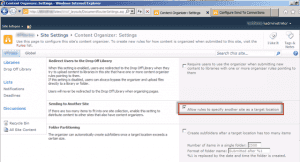
Now you can go to “Site Settings”, “Content Organizer Rules” of the site and create a rule that can target another site.
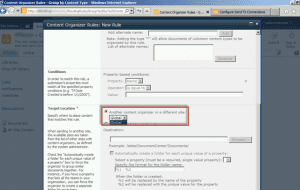
There is one limitation to this approach: you can target a different site but you can’t target a specific document library on that site. The document will be routed to the Content Organizer on that site and its rules will be enforced. So, in order to overcome this limitation you have to add a rule on the destination site that will route the document into a specific document library.
As it begins to become a little tricky to explain in words, I’ll draw a quick diagram to explain how my system works:
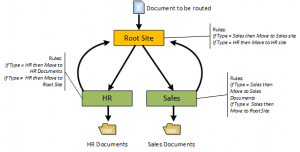
I add the routing rules to the Root Site that will send the newly uploaded document to the correct site, according to a Type column (in my case it’s a Managed Metadata column but it could be any type of column that can be compared to). When the document arrives to the Content Organizer on the destination site, I put two simple rules there:
- If the Type of the document is the correct one, I move the document to the corresponding document library
- If the Type of the document is not the correct one, I route the document again to the Root Site
The purpose of this loop is to minimize the number of rules for the correct classification. If the user uploads a Sales document on a HR site, I’d have to write the rule that moves it to the Sales site. By keeping all the routing logic for the different site at the Root Site level, I just have to send the document to the root site in order to get classified correctly.
Note: this setup can cause infinite loop if you mess with the rules and conditions, so please double-check them.
PowerShell to the Rescue
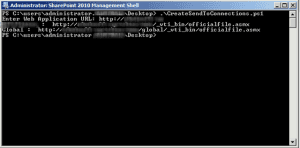
So, we have seen how to organize a multiple-site hierarchy with the Content Organizer feature. I admit that the only boring thing in the whole process is the act of building the “Send To” connections by hand. I have created a tiny PowerShell script that will do that for you. It will parse the given web application URL, iterate over all the sites in the site collections and then will add the sites with active Content Organizer to the “Send To” connections.
